
The blog is a collection of destination wedding and elopement highlights sharing your beautiful stories. It also includes wedding planning tips and inspiration.
Weddings
elopements
couples
Portraits
bride tips
Get Inspired
destination and Jackson hole wedding photography
How to Apply Basic Edits in Lightroom Mobile
Basic Editing in Lightroom Mobile
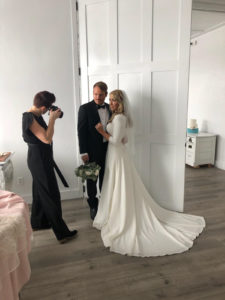
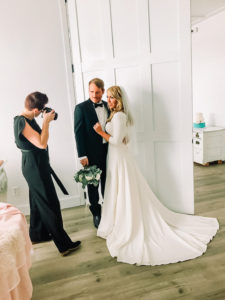
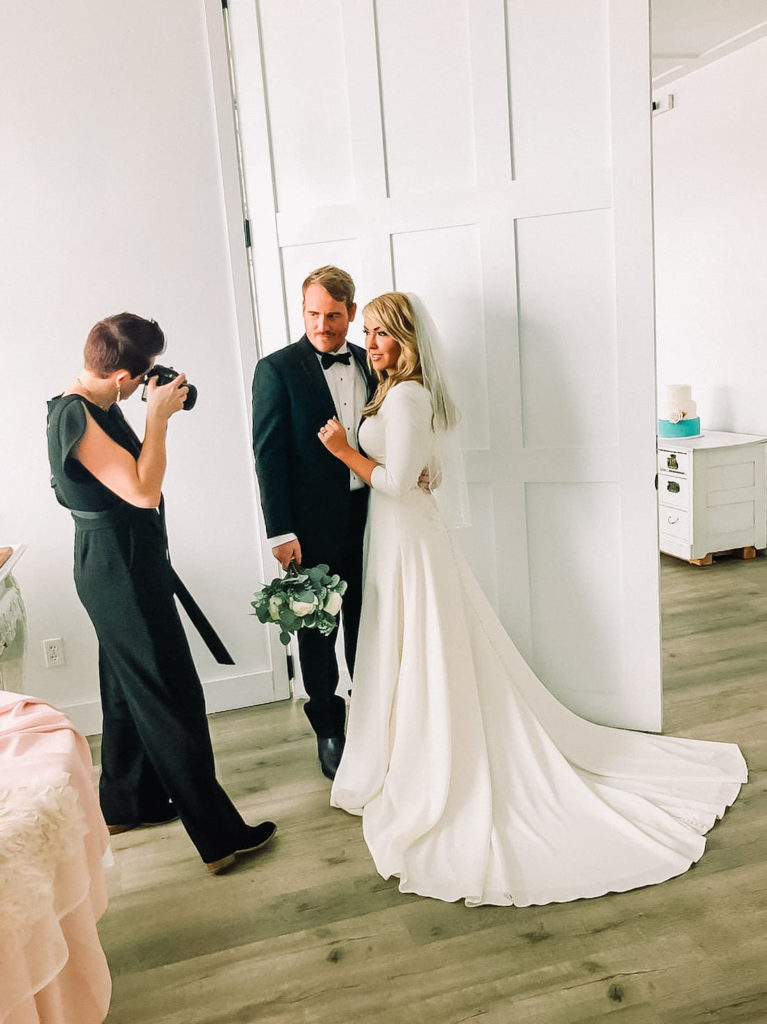
If you’re new to Lightroom Mobile, it can seem a bit overwhelming! Never fear, these quick editing tips will help you know what to do once you’ve already followed the Getting Started in Lightroom Mobile guide. This blog guide will cover how to apply a preset, adjust lighting, adjust color preferences, use the color mix preferences, crop, and export your edited photos! I’ll be using this behind the scenes photo as an example. Here is a step by step of how to edit photos in the Lightroom Mobile App.
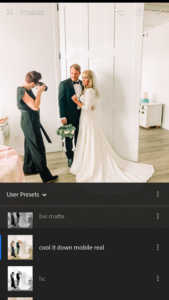
1. Apply Preset
Apply your Janelle & Co Preset of choice by choosing it under “User Presets”. For this example I am using my Cool It Down Mobile Preset for Lightroom App.
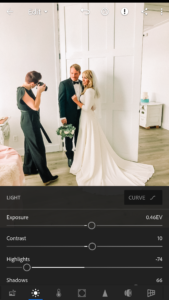
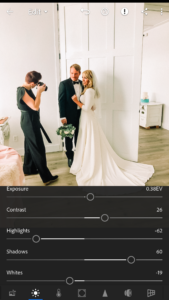
2. Adjusting Lighting
Choosing the sun icon on the toolbar will open the “Light” adjustment panel. This is where you can make changes to exposure, contrast, highlights, and shadows.
Exposure adjusts the overall lightness or darkness of a photo.
Contrast brightens highlights and deepens shadows.
Highlights adjusts the lighting of the brightest areas of the photo (usually faces, sky, etc).
Shadows adjusts the lighting in the darkest parts of your photo.
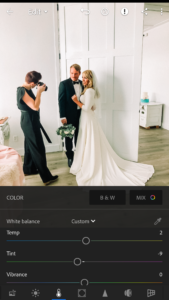
3. Adjusting Color Preferences
Choosing the thermometer icon on the toolbar will open the “Color” adjustment panel. This is where you can make changes to your white balance. This includes temperature, tint, vibrancy, and saturation.
Temperature and Tint will adjust the overall color of your photo.
Vibrance and Saturation will adjust the overall color density of your photo, or how bold your colors are.
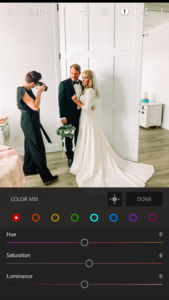
4. Color Mix Preferences
In the Color tab (thermometer icon), you can choose the MIX icon. This will open up a new window with Hue, Saturation, and Lumination.
This is where you can fine tune each individual color tone. For example, if your reds are not quite what you want, you can edit just that selection! Choose “red” on the color mix palette. Then you can adjust the Hue of your red (scale of purple to orange), the Saturation (how bold your color is), and Luminance (how dark or light your color is applied).

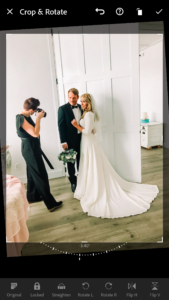
5. Crop
Crop your photo to help center images or remove distractions on the corners.
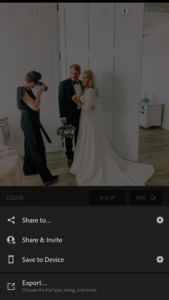
6. Export
The app will save your edit progress, but in order to post them online or share them, you’ll need to export your edited photo.
Click the “Share” button in the upper right hand corner. It looks like a sideways “V” with bulbs on the end
Choose “Save to Device” to save your edited photo to your phone’s camera roll.
For more options, you can also choose “Export…” to make additional size and quality adjustments.
Voila! You did it!
There you are! You have your final edited photo saved on your device. Now go share it!
For more Lightroom Mobile editing resources, check out our guides:
Getting Started in Lightroom Mobile
How to Install Lightroom Mobile Presets
And Click Here to Purchase the COOL IT DOWN Mobile Preset and other Janelle & Co Presets.